My Modern Met Feature!
We are so proud to share that we were featured this week on the My Modern Met Facebook page!

The site is beautifully curated - I feel special!
We are so proud to share that we were featured this week on the My Modern Met Facebook page!
The site is beautifully curated - I feel special!
Etsy's latest campaign #DifferenceMakesUs aims to celebrate the originality that makes Etsy so special. This past week I was one of the lucky Etsy sellers invited to celebrate the launch of this campaign at the Alison Milne Gallery, and WOW it was amazing.
The Etsy Canada team completely spoiled us. I actually started typing out a list of all that they treated us with, but it was so over the top that it seemed RUDE to list it all here. Instead, gush at my photos!

My place setting - quite a different scene from my usual lunch at the studio....

My wreath made with Coral Wreath Designs - STILL hanging on my front door at home (I've deemed it a year-round wreath).

My PERSONALIZED gifts (and wrapping). What the hell?!
Check out more from #DifferenceMakesUs!
The AGO and BRIKA asked me to do a cool thing (this thing) and then made this video about it!
The AGO and BRIKA recently invited me to do a window installation inspired by Van Gogh's Starry Night Over the Rhone at Arles, one of the pieces coming to the Mystical Landscapes Exhibit on October 22nd.
I felt super excited and flattered and terrified.This is the largest papercutting piece I've ever created, and was completely cut by hand, all to happen in October (my ramp up for the busiest month of the year). Terrified.
I wanted the piece to be airy - to invoke a lightness, and for it to be complex enough to take over the space, but not so intricate that the detail got lost. Conceptualizing it was tricky - I haven't done many 3D pieces, and nothing to this scale, so I had to re-think a lot of my earlier notions of how it would work. I'm so pleased to share the final product, and some of the photos of the process. This may be the thing I am most proud of!

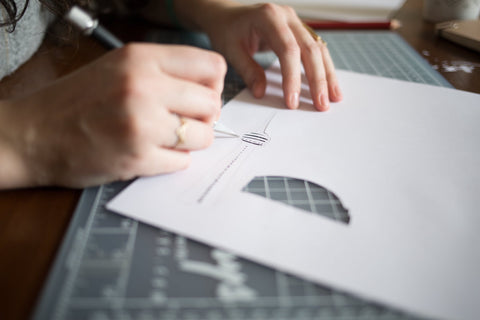
A before shot, in the studio, of some of the pieces that I hand-cut for the piece. Each piece was cut freehand with an x-acto knife - no drawing or sketching out the lines that I would cut beforehand, I just let the knife do all the work. 90% of the pieces were cut beforehand at the studio, but I did hand-cut several pieces on site.

Setup Day 1: Remove 1000 puff balls from the window!

The first cloud that there ever was.

Each piece was hung individually, and each position carefully chosen. I had a friend help me for both set up days, to help hold, judge, and reposition the pieces to the exact right spot.


This is my favourite photo of the piece, from behind it, inside the window.

sup.

Ta da! I'm not one to get emotional (at all)....but looking at these photos gives me HEART FEELINGS. Watch the video about this piece here! See this piece at BRIKA on Queen East until February! And see Mystical Landscapes at the AGO!
All our products begin as a papercutting piece. Owner and Founder, Ali Harrison, creates each Light & Paper product our of paper, using on an x-acto knife, and her imagination.

Sometimes Ali will re-cut a design 4 or 5 times before we're happy with the final product. Ali cuts most of the designs "free hand" - only drawing out the outlines before she begins. The rest is cut from scratch, like drawing with a blade.
Once the pieces are cut, we put them into our scanner and upload them onto the computer. Then we work the digital magic using Adobe Illustrator, and convert the files to vector images. After the file is converted, just press print to send it to be cut by the lasercutter!

Once the design has been cut, we package them up and they are ready to go! 
All our ornament sets come packaged within the wood they are cut from, in a cello bag with a fun sticker!
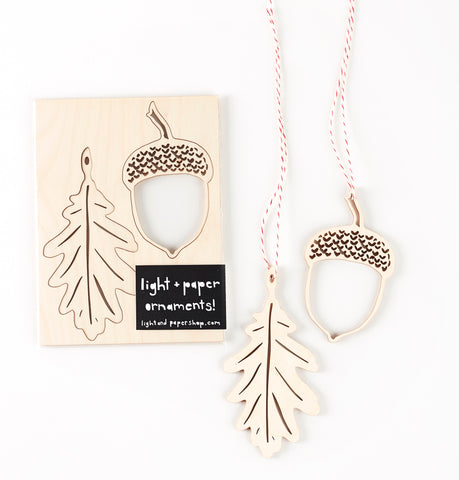
Pop each of the ornaments out, and then hang to display!

Is there anything more adorable than mini pottery? Other than puppies of course....loving these tiny pieces by Almeda Pottery!
In September 2015 I had the pleasure of helping two great friends decorate their wedding. A fun, easygoing early fall wedding, with bikes, pups, and the BEST music! For someone with no desire to get married myself, I have a super obsession with wedding decor, and I love helping out friends with their wedding flowers, backdrops, centrepieces....everything. Plus, it's fun to see my wedding products in use! For Dom and Bo's wedding, I created the bouquets, centrepieces, photo displays and cake decoration. Shoutout to Scarlet O'Neill for the beautiful photos!

The Enoch Turner Schoolhouse located in downtown East Toronto is a gorgeous rustic venue. The space is so simple and perfect, so not much decor is required.

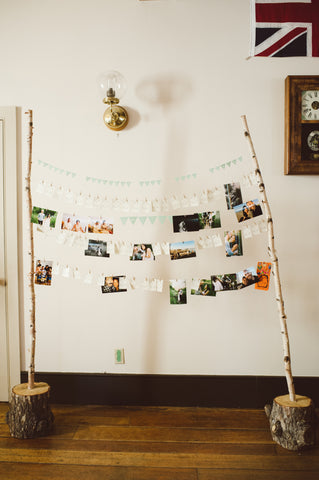
Instax mini cameras and a photo display board was super fun, and keeps guests busy in between the ceremony and reception!
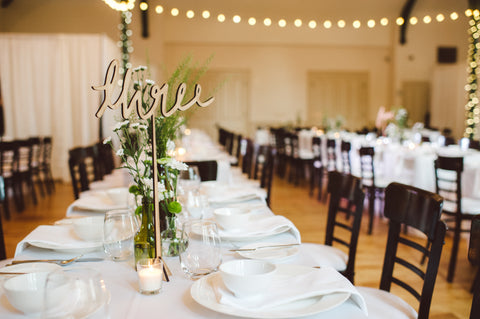
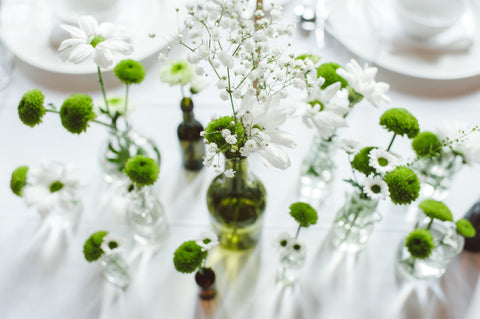
We kept it simple with daisies, green button poms, and baby's breath for the flowers. Filling all those bottles is a pain, but worth it for the cute factor.
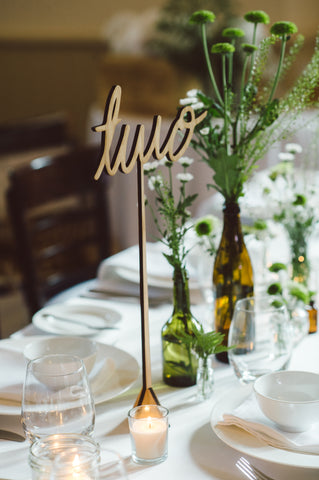
Our bamboo table numbers are really eye catching! I love how they added to the simplicity of the white and green settings.

Easy cake decor 101 - just add flowers and a topper! We used the "best day ever" woodlands topper. Full disclosure, I made a beautiful custom topper for Dom and Bo that I then forgot at my studio! Luckily we had this as backup.

We kept it super simple for Bo's bouquet - the green and white of the daisies and green buttons works so well - especially at this venue.

Don't forget the puppy kisses!
Venue: Enoch Turner School House
Photos: Scarlet O'Neill Photography
Decor + Flowers: Light & Paper
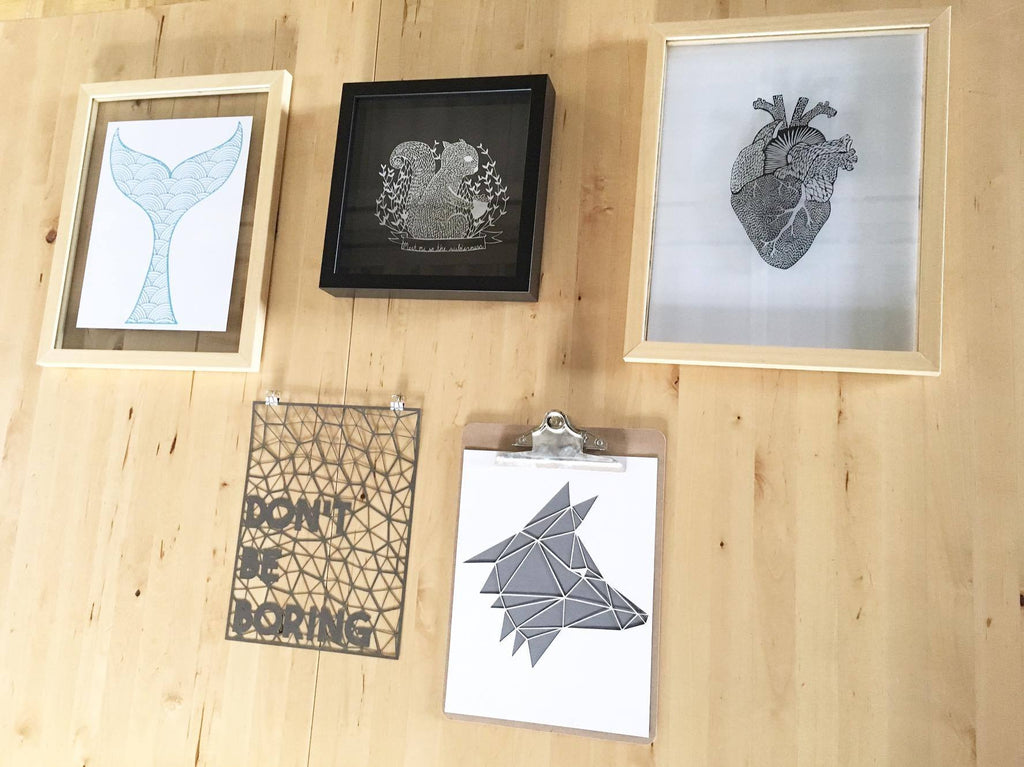
Many people are unsure of how to frame their papercutting piece - mainly because they haven't framed one before.

BUT - it's easy! And there are lots of options! One of the reasons I love papercut artwork is because they look so different than normal art prints, and they can really bring a unique look to your walls.
Some options from the photo above:
1 - floating frame with paper background. For this option I attached our whale fluke papercutting to a white paper behind it with a small piece of double sided tape, and then put it in a larger floating frame.
2 - shadowbox frame - I attached the papercutting to a dark grey background. This option is great because you can see the papercutting sit up off the background.
3 - Floating frame with no background paper - this is my favourite way to display the anatomical heart - and it looks beautiful in a window! Floating frames have two panes of glass. Use a small piece of double sided tape to attach the papercutting onto the back piece of glass.
4 - Straight up binder clips! Very easy - but only an option for pieces with a border
5 - Clipboard - just as easy as binder clips!
View more display ideas and inspiration here!
Head over to our instagram to enter for your chance to win our best giveaway ever!
Enter to win these 4 great Light & Paper products:
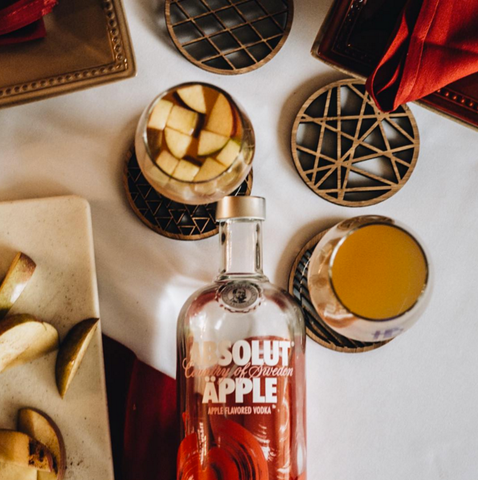
1- Geo Coasters (ppl love 'em)
4- Brand NEW! Up the Happy pennant!
All you need to do is follow us on instagram, like the photo, and tag 2 friends in the comments! We'll be choosing a winner this Friday :)
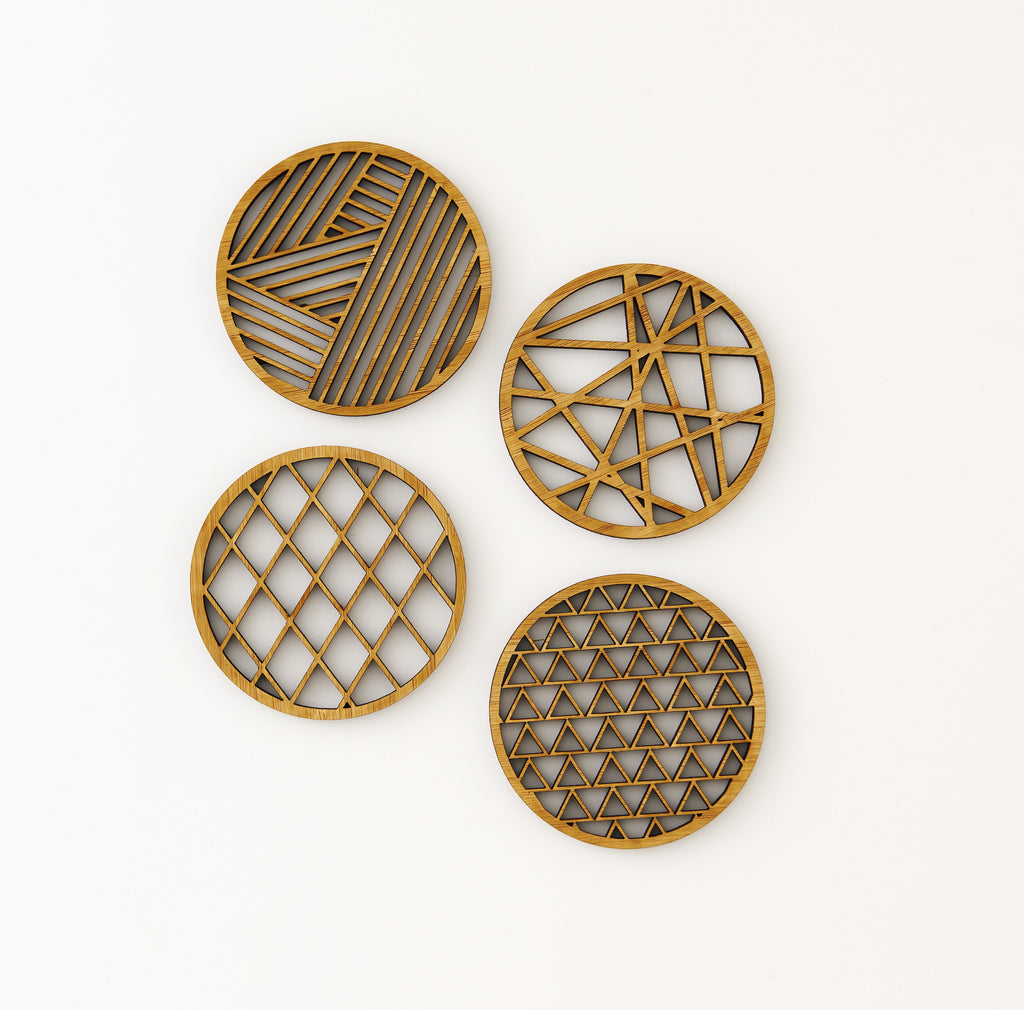
Ok....it's official, as far as features go, geo coasters are the people's fave!


Comments
0 Comments